At the start of the session we were asked to make the three other buttons for our website. We were told that they had to be a specific size and saved in a specific way.
Examples...
How to import these buttons to dream waver
adding another div id
selecting a roll over button
we choose the web buttons in this window
the button in place
How we link pages to others
Editing the code to link to the pages
After we had been shown how to do this we were asked to link the other pages.
Diagram detailing the columns we are adding to the website
The box model..
Take the width that is available, add up all of the different factors which we are planning to have, then minus it from the width.
20 px padding is the usual
Diagram to explain the box method

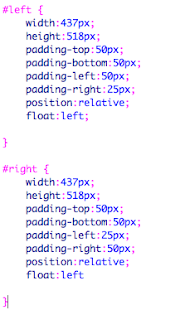
adding the code for the two columns
adding text before copy has been completed. we use Lorem Ipsum
formatting our type
<p> = paragraph break
<br> = line break
here we can see the columns working
changing the font size...
in stylesheet after the font family..
font size:14px;
changing the colour
color:COLOURGOESHERE;
heading tags..

h1 in stylesheet

add it to html.
preview in safari.
We can have as many heading tags as we want
Adding an image to our website..
To upload video use Vimeo - embed
For audio use sound cloud and embed
Advantages -
- does not use our bandwidth
- streams it, it does not need to buffer
- Lightbox - image gallery


Leave your comment