Today I went to a laser cut session to experiment with embossing as I was unable to attend a workshop at Vernon Street. I had my induction last week but I wanted to expand on the process more and develop my idea for the print brief.
I went to with two designs which I had quickly put together on Illustrator. I wanted to make something really simple which would test the embossing process the best. The first image I went with was a piece of block text in Bebas font. I like this font and use it often in my work but I mainly chose it because I thought it might work the best and produce a nice bold embossing plate. The second image I went with was the same font but in circles. This is an idea I have had for quite a while, I took my inspiration from the CMYK circles but added one extra circle to accompany the 5 letters of print.
When I arrived I opened my file in Ethos which is the program which allowed me to size my design and choose the type of cut I wanted. Because I was cutting my design to be used to emboss I had to change the setting to negative so the laser knew to cut the background and not the letters. Once I had done this I could choose my material and send it to cut.
I watched the file be cut and it took around 20 minutes. It was a very exciting experience and I think I will be using it very often in the future.
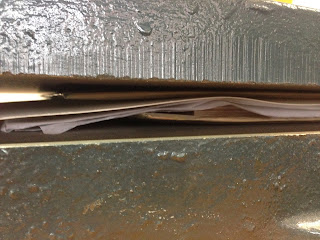
When the file had been produced I was very impressed with the depth it had achieved. I was slightly concerned that the depth of the cut was not going to be large enough to make a successful emboss. I took some photos to show the depth of the cut. If I wanted to make my design deeper still I would have to send it to cut once again and this could make the letters stand off the page more.
For my second design I had to make some changes. The circles I had produced were too thin and would not work for embossing. I quickly drew out another image on illustrator and unfortunately had to use a different font due to the computer not having Bebas installed. I still used quite a chunky font so that my design would be clear. I used Courier New Bold. As I was cutting to emboss I had to make my design negative so the machine would know what to cut.
I did not have as much time as I would have liked on the machine so I had to send the design to the cutter in a very basic cut in order for it to be produced very quickly.
The end result was not as impressive as the first but I was still happy with the outcome. I
Both of my designs we put onto one piece of MDF and each was cut out individually by the workshop professional. I took an image of the two designs on the same piece of material to look at the contrast which they had together.
Embossing
When it came to embossing at Blenheim we do not have the proper machinery, this is at Vernon street. Even though it was not guaranteed we still tried it out on a manual press. We laid out our designs on a piece of padded material and laid tissue paper on top of it then handmade paper.
We placed it in the press and applied pressure to it in the hopes that it would emboss. Our first attempt did not work very well but we were instructed to dampen the paper to see if that gave us a better finish.
We placed it back in the press and applied more pressure.
The outcome was as expected, it had embossed but not to the extent we would have liked. We tried this one more time and had similar results which was quite disappointing.
Overall this was a very beneficial process and I enjoyed it very much. There was one surprise I had which was that the circlular design embossed much more successfully than the block letters. I am not sure whether this has something to do with the distance between the laser strokes in the material or whether it is because it is a distinct shape. I would like to try to emboss with the blocks on the proper machine and see if the same result is seen.


Leave your comment